Retraining the cellfinder classification network#
In this tutorial, you will use the cellfinder plugin for napari to retrain the cell classification network.
The aim of this tutorial is to get up and running retraining cellfinder using a very small training dataset. When it comes to using cellfinder with your own data, it is very important to retrain the network properly. You also may want to use the command line tool instead of using napari. For more information, please see the full cellfinder re-training documentation.
Before running this tutorial, please run the cell detection tutorial first.
Note
You will need napari installed on your computer - please follow
napari’s installation instructions to do so
(including their recommendation to use a conda environment).
Open
napari.Open the curation widget by selecting
Plugins > cellfinder > Curationin the napari menu bar near the top left of the window.Load some sample data
File > Open sample > Sample data (cellfinder). This will open the same small two-channel 3D image from the detection tutorial.Click
Files > Open File(s)and select thecells.xmlfrom the detection tutorial. If napari prompts you to choose a plugin, choosebrainglobe-napari-io.Set the
signal imagetoSignalSet the
background imagetoBackgroundClick
Add training data layers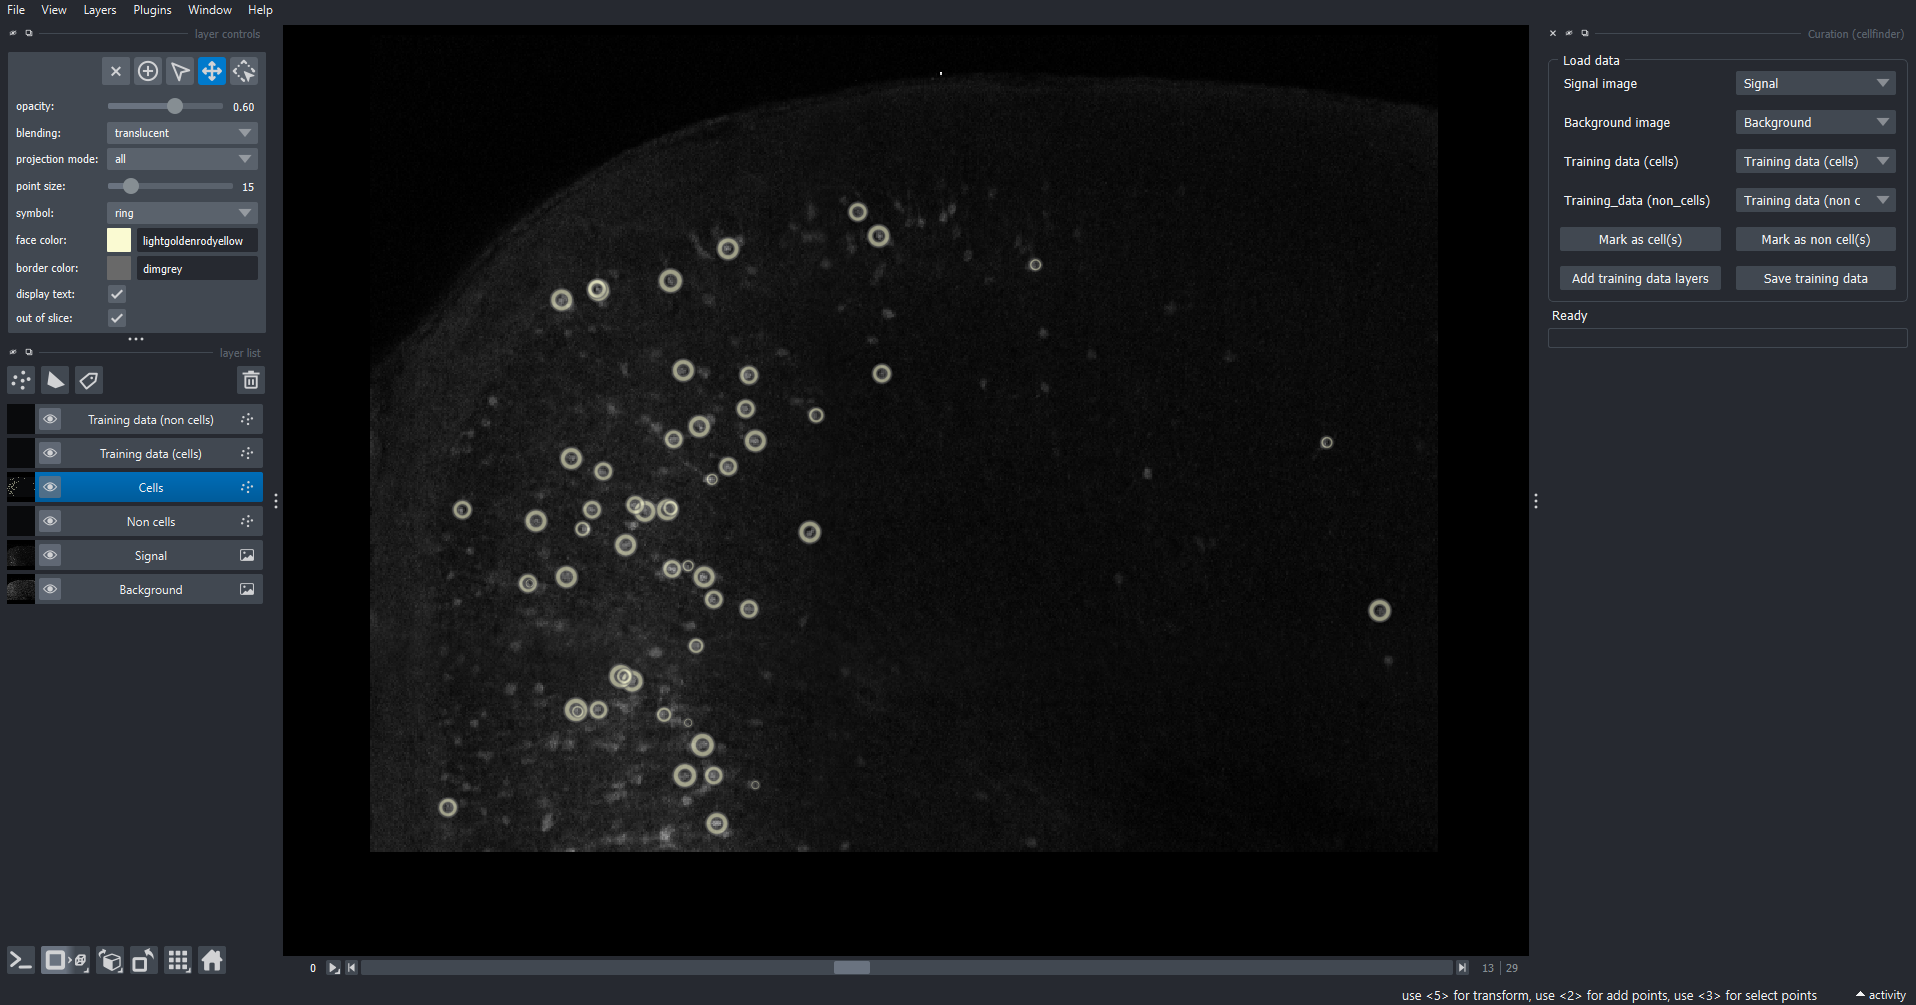
The curation widget appears on the right-hand side of the window alongside the raw data with detected cells overlaid
Highlight the
Cellslayer and then choose theSelect Pointstool by clicking the arrow in the layer controls widget, or pressing the3key on your keyboard.Select some cells in the image by drawing a box and click
Mark as cell(s)Select some different cells in the image and click
Mark as non cell(s)Click
Save training dataCreate and then select a new directory on your computer (e.g.
cellfinder-retraining) and clickChoose.Close the curation widget by clicking the
xat the top left of the widget.Open the retraining widget by selecting
Plugins > cellfinder > Train networkin the napari menu bar near the top left of the window.Select the data for retraining by clicking
Select filesnext toYAML filesand choose thetraining.yamlfile is inside thecellfinder-retrainingdirectory created earlierChoose a directory to save the training output, e.g., create a
trained_networkdirectorySet
Epochsto 100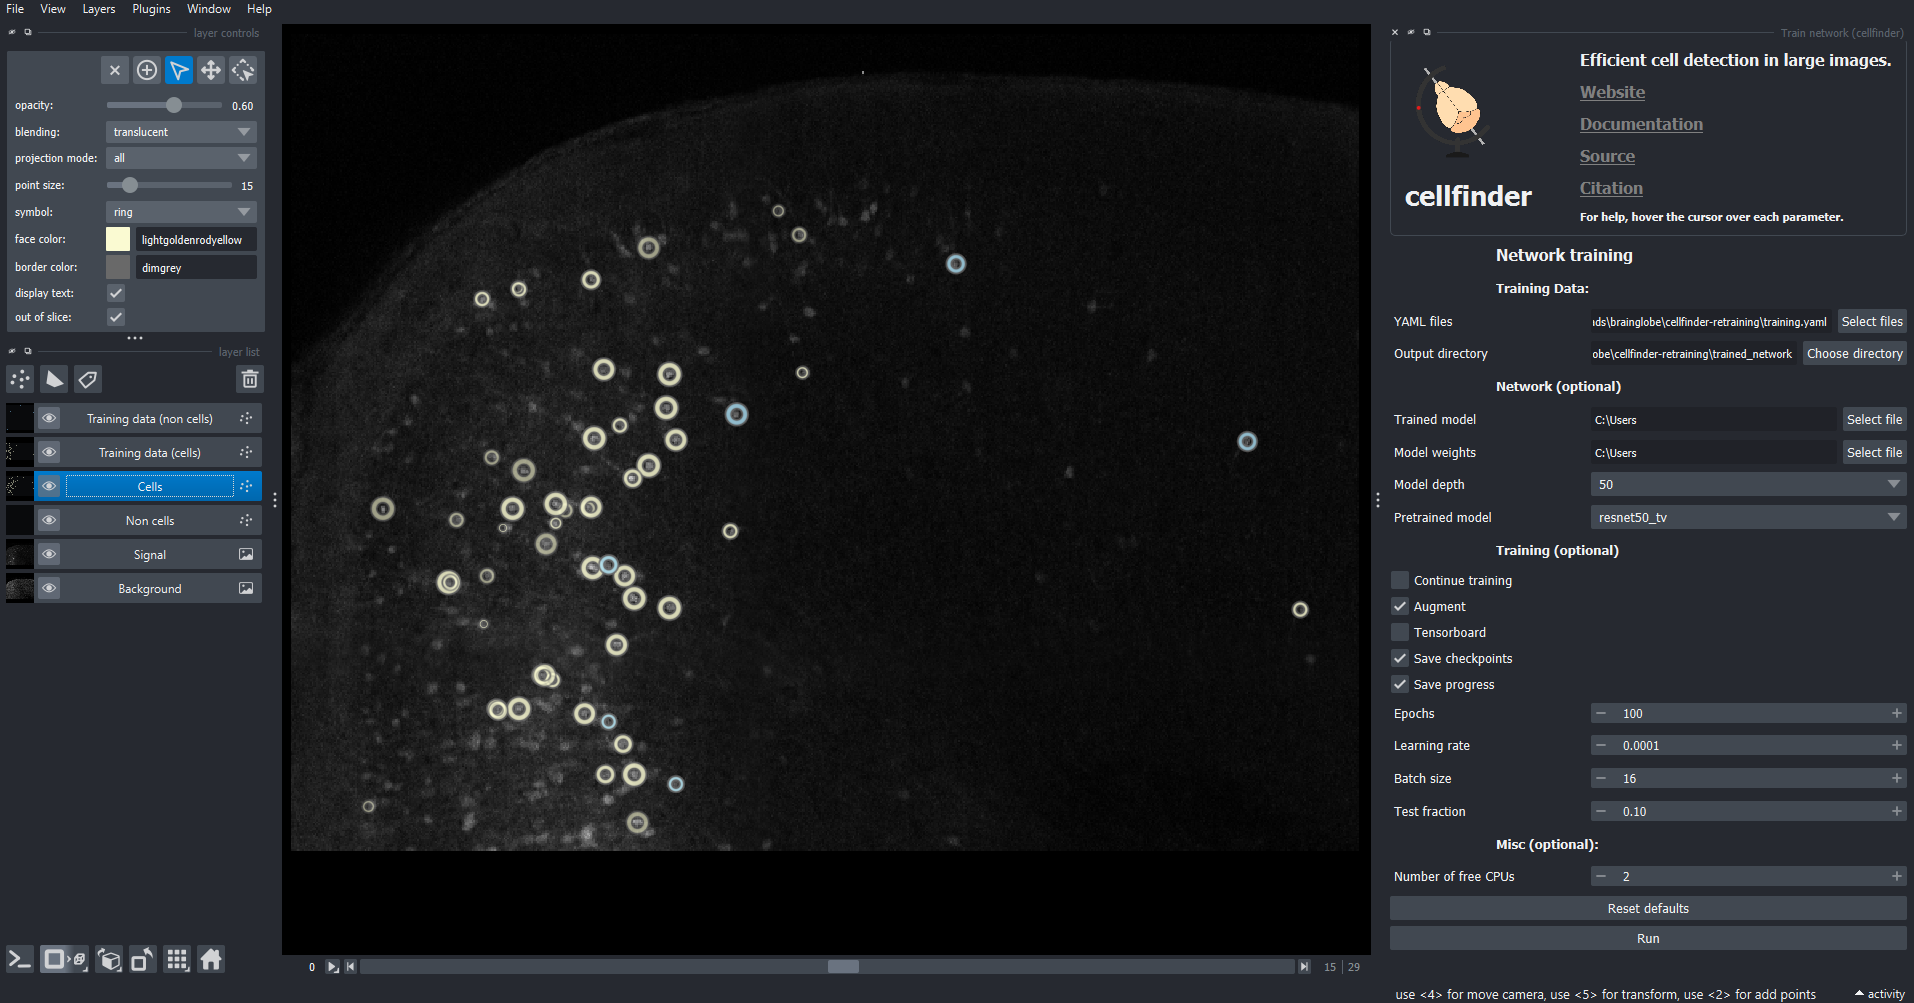
The training widget appears on the right-hand side of the window.
Click
runThe training will then run, watch the terminal for updates. Once complete, there will be trained models (files ending in
.keras) in thetrained_networkdirectory that can be used for cell detection.
Hint
For more information about how to use the curation and training plugins, please see the full using cellfinder in napari guide.