Segmenting 2/3D structures#
In this tutorial, you will use the brainglobe-segmentation plugin for napari to segment a a 3D (or 2D) structure, such as an injection site. As a prerequisite, you will need to have registered your data to an atlas using brainreg and know what folder you saved this in (your “brainreg output directory”). If you don’t have this, please follow our registration tutorial first.
Note
You will need napari installed on your computer - please follow napari’s installation instructions to do so (including their recommendation to use a conda environment).
Open
napari.Install
brainglobe-segmentationby selectingPlugins > Install/Uninstall pluginsand searching forbrainglobe-segmentationin the searchbox. If it is not installed yet, click on theInstallbutton.
Caution
On Silicon Macs you may have to conda install hdf5 first for the installation to be successful.
Open the
brainglobe-segmentationwidget by selectingPlugins > Region/track segmentation (brainglobe-segmentation)in the napari menu bar near the top left of the window.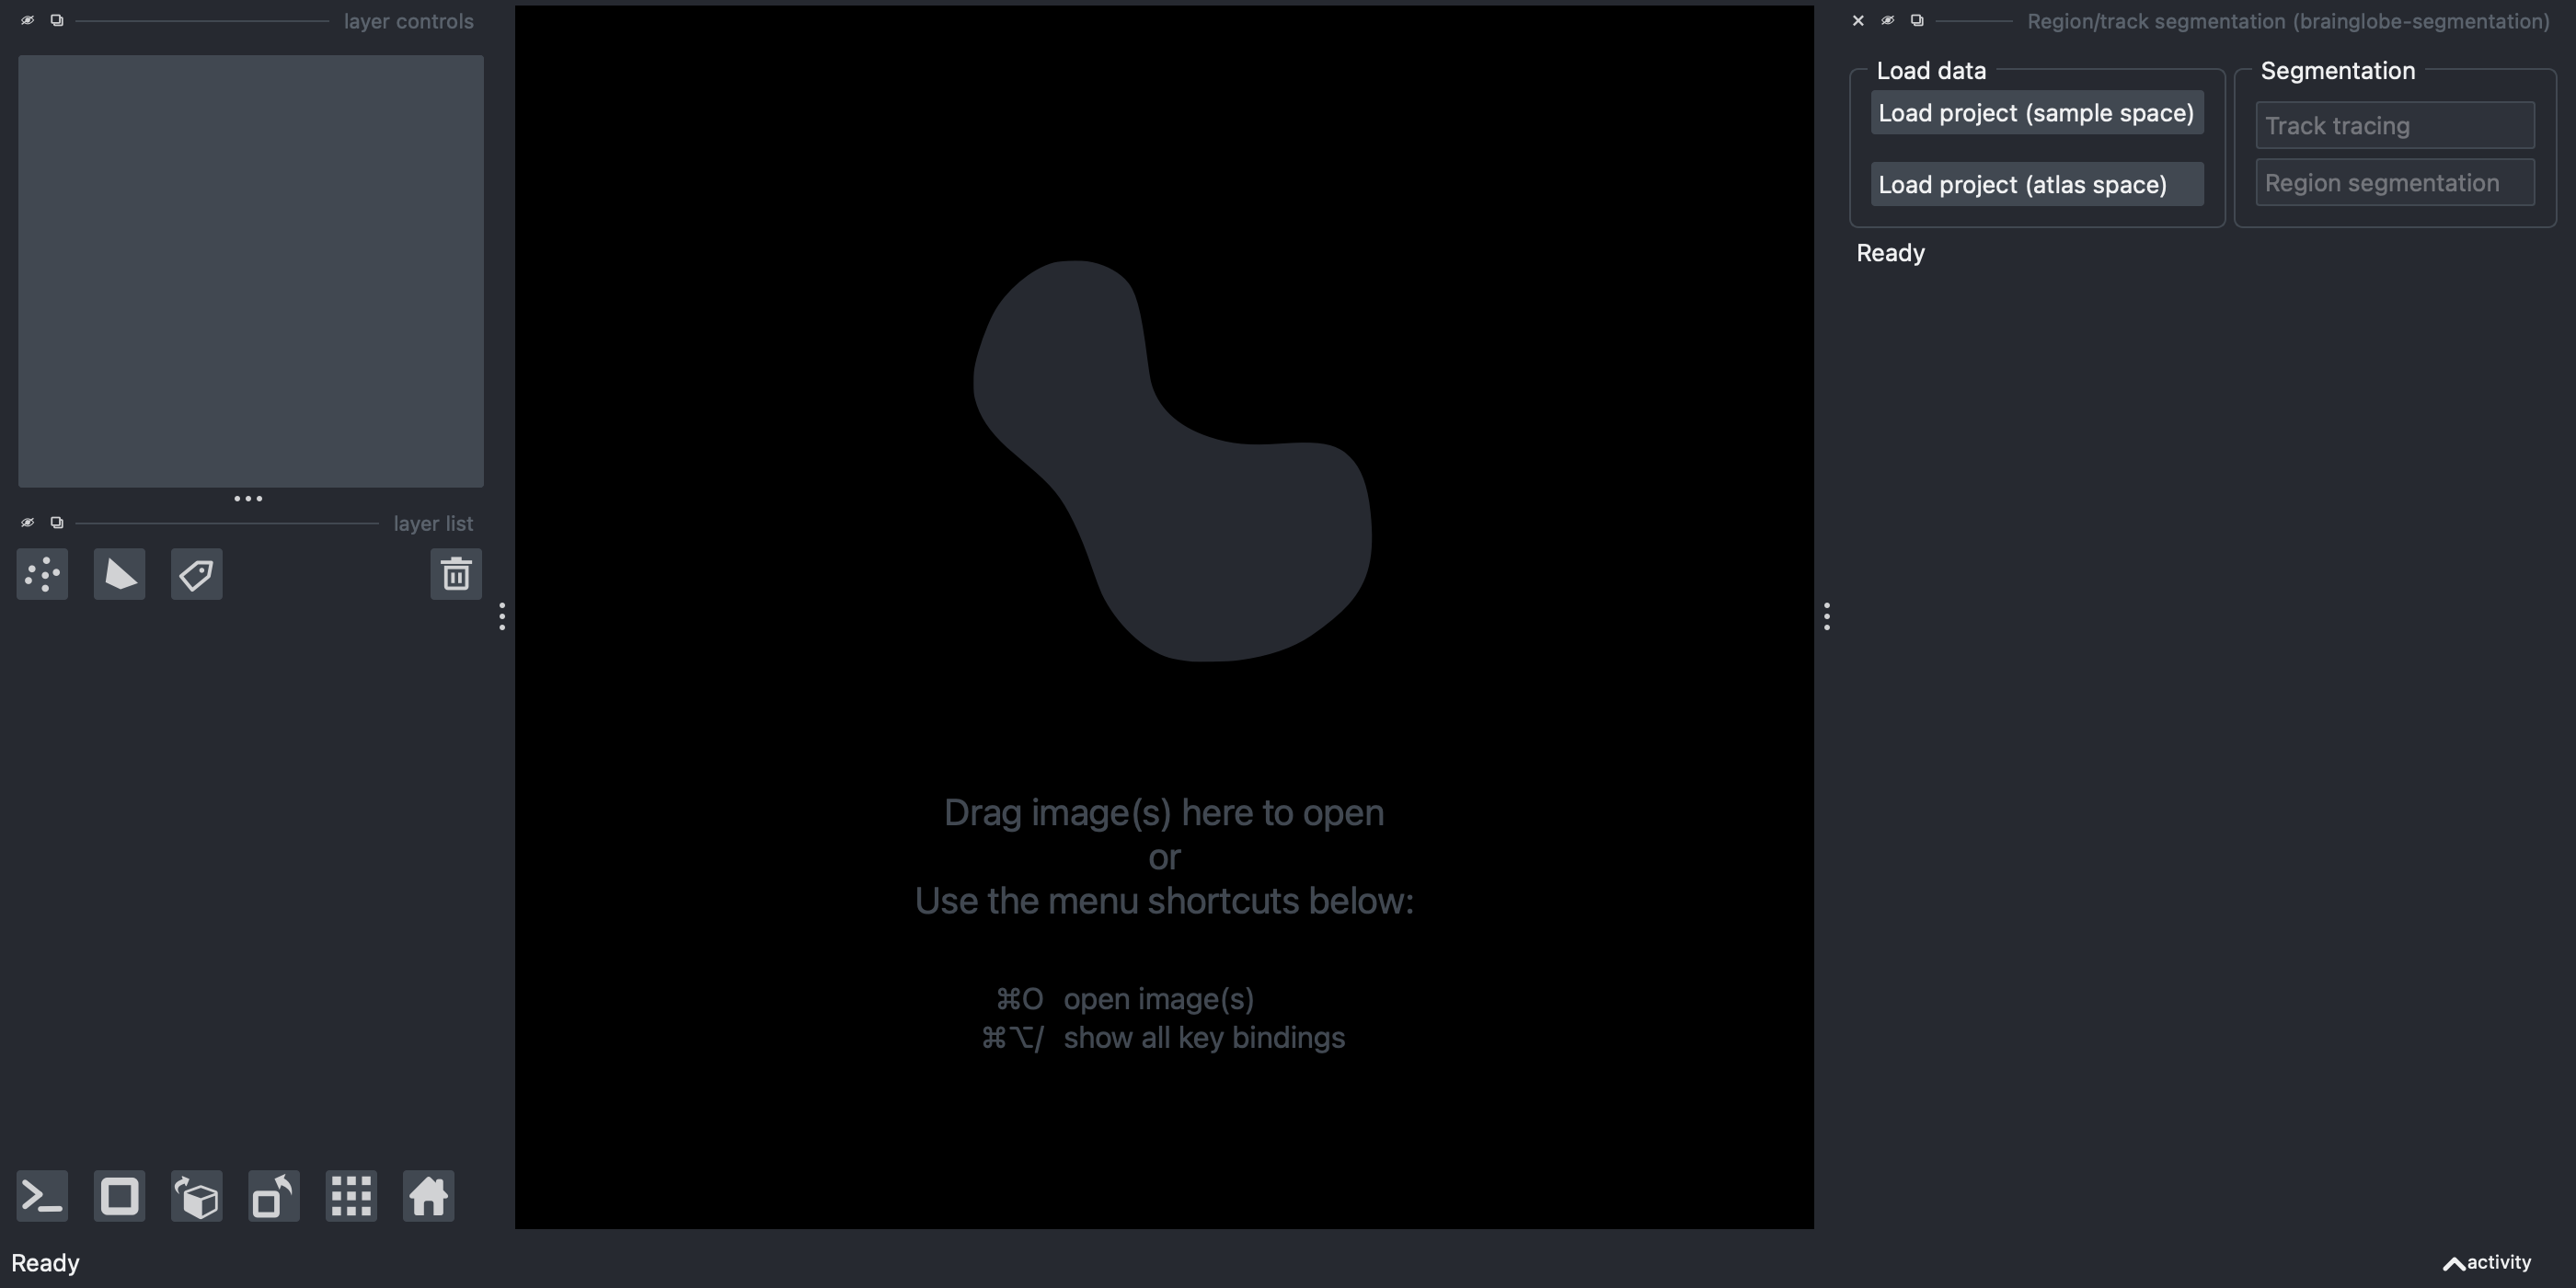
The brainglobe segmentation widget appears on the right-hand side of the window.
Load your registered data in atlas space by clicking on
Load project (atlas space)and navigating to yourbrainregoutput directory.If required, adjust the contrast on the registered image by selecting the
Registered Imagelayer on the left of the screen, and clicking onAutocontrast: onceon the top left of the screen.Click the
Region Segmentationbutton in theSegmentationpanel.Click the
Add new regionbutton.
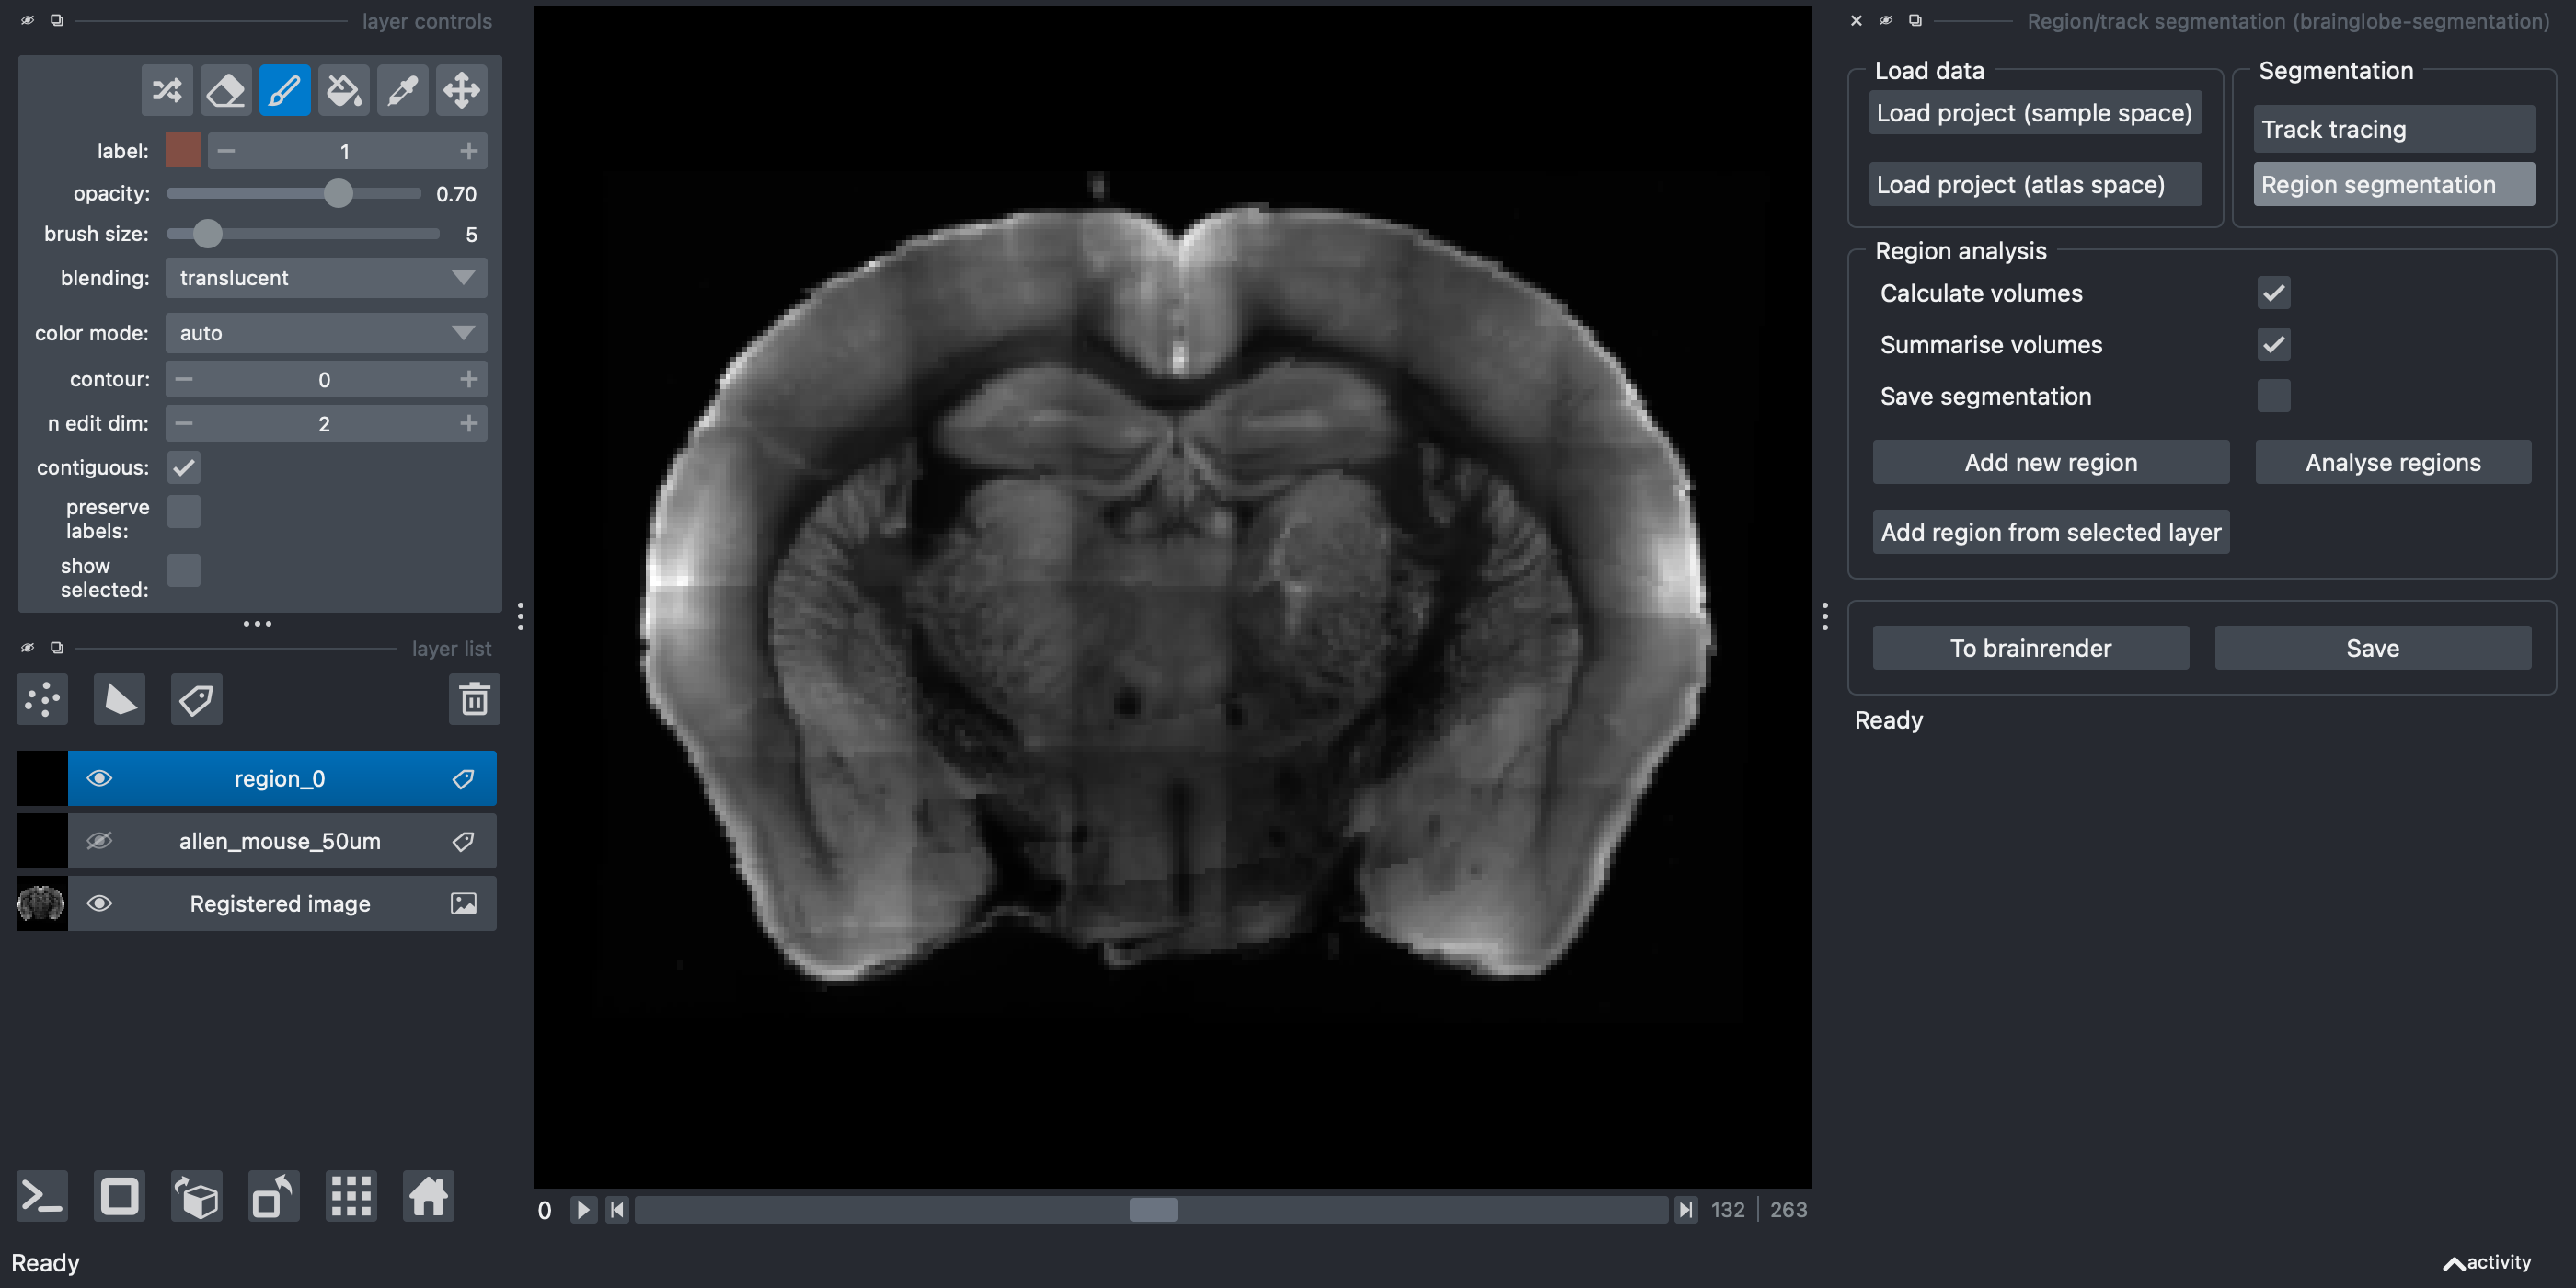
A new Labels layer named region_0 appears on the left hand side.
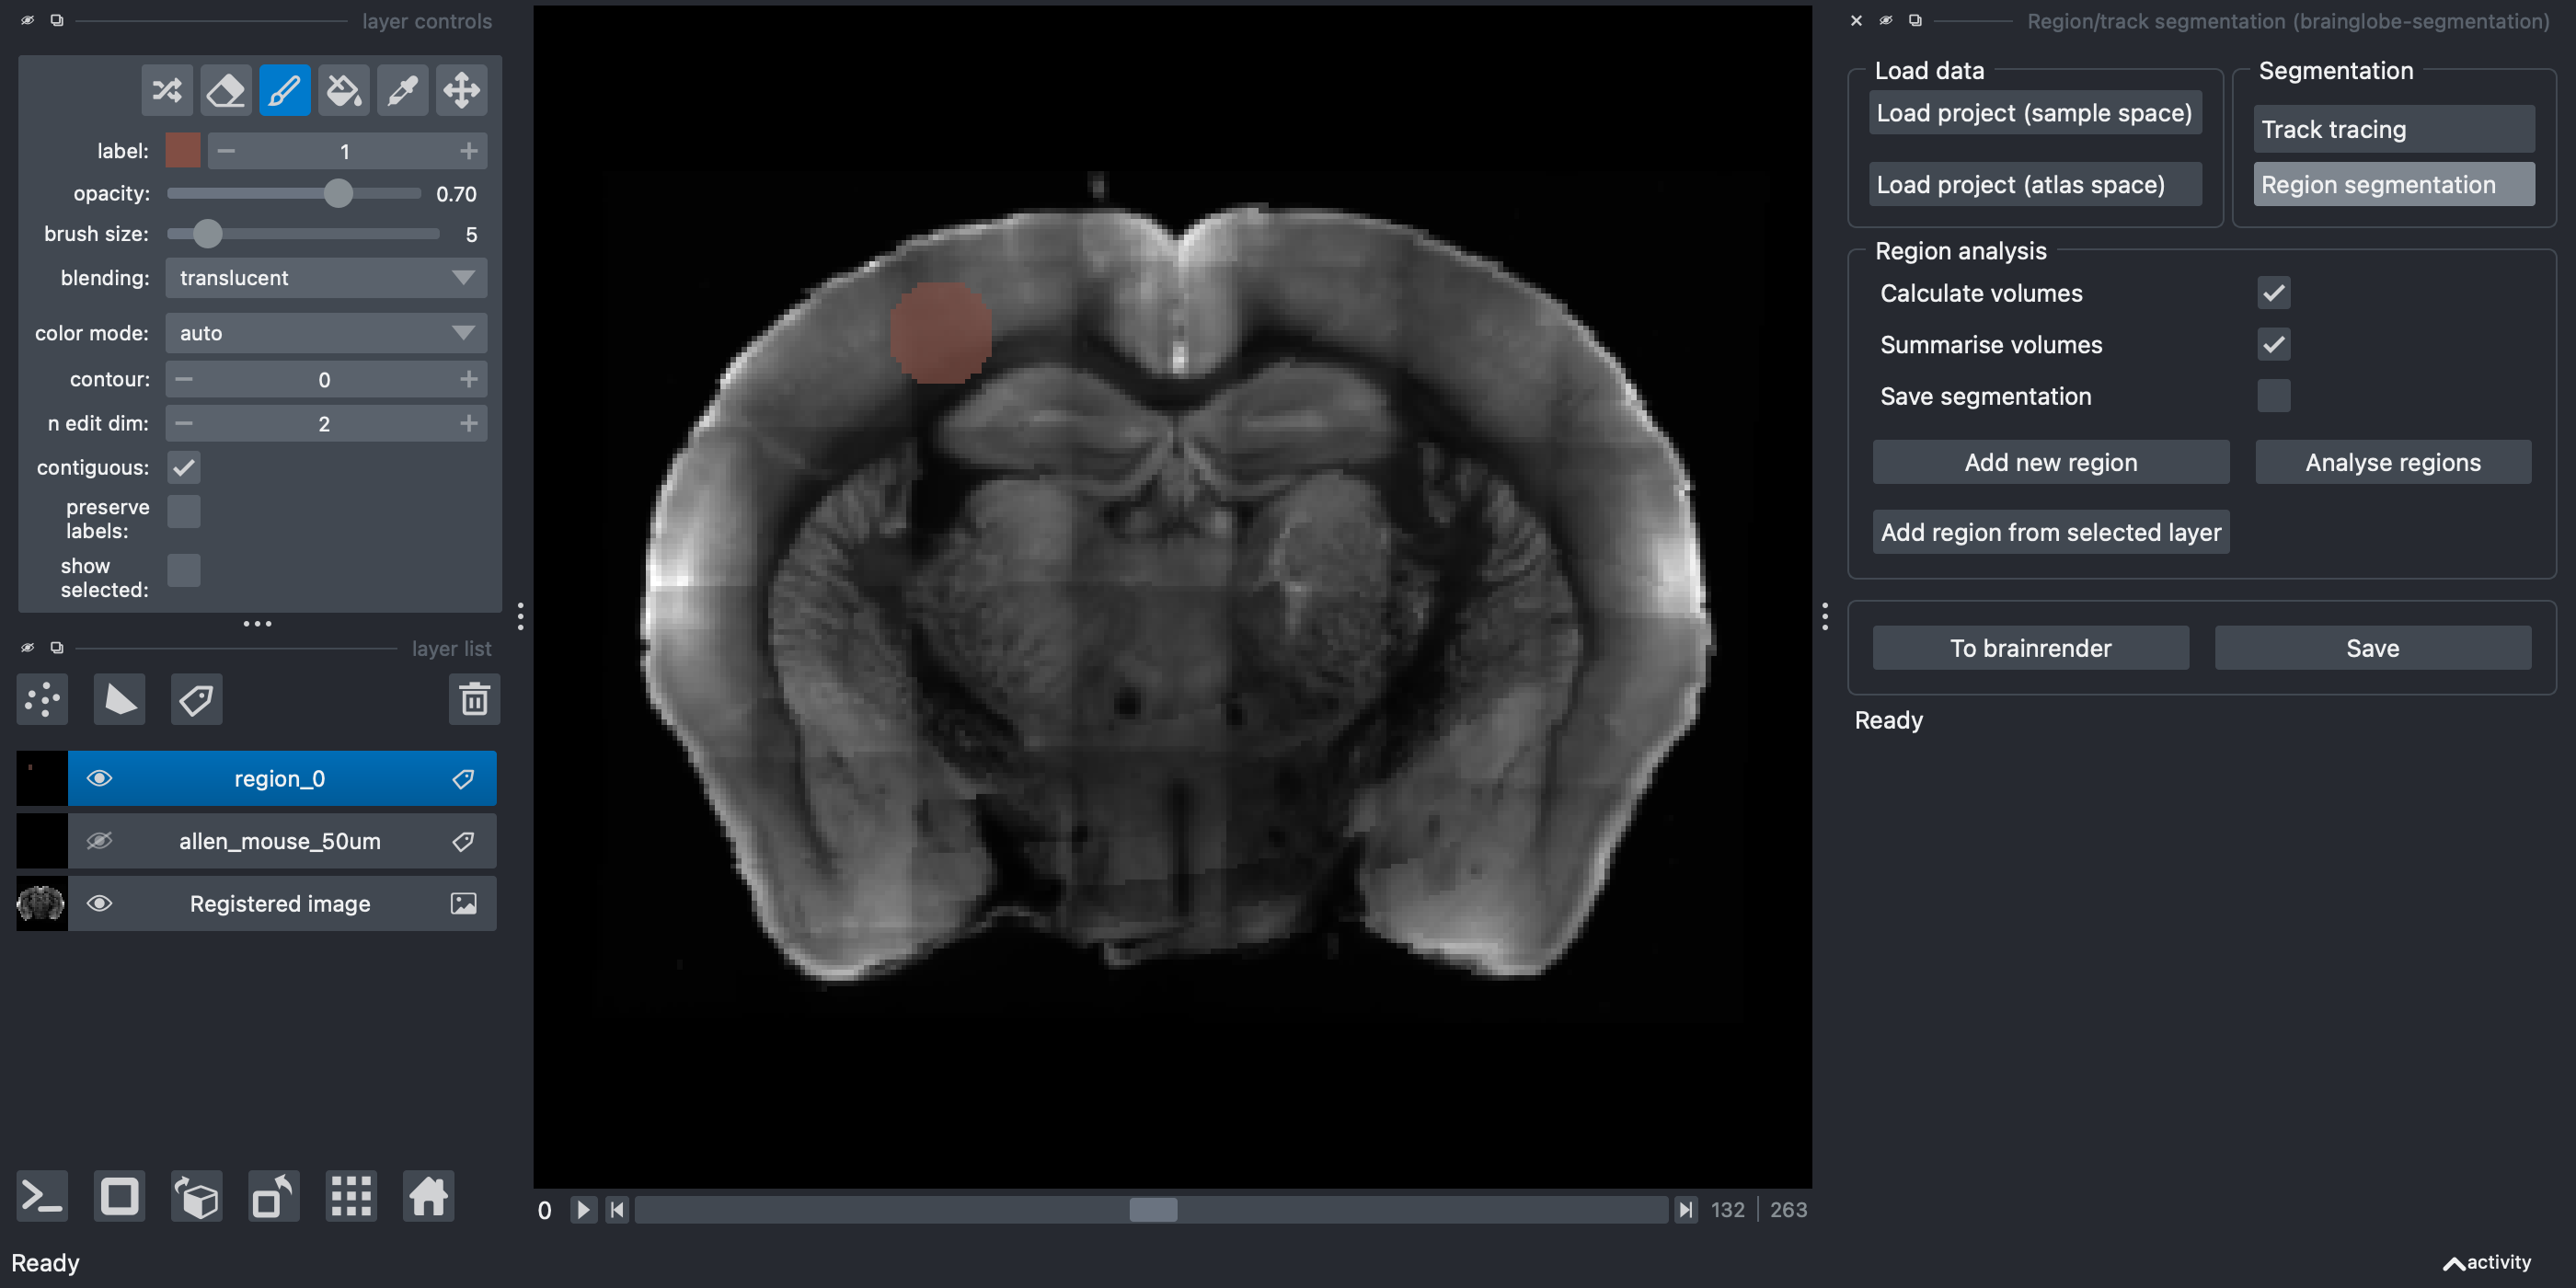
If required, rename this region (by selecting the e.g.
region_0text)Navigate to where you want to draw your region of interest.
Choose a brush size (top left box).
Make sure painting mode is activated (by selecting the paintbrush icon, top left). You can go back to the navigation mode by selecting the magnifying glass.
Colour in your region that you want to segment by holding down the left mouse button, ensuring that you make a solid object. For 3D structures, set
n edit dimto3to paint a sphere instead of a circle, or paint circles across several slices. You can change slice using the slider at the bottom of the screen.
Repeat steps 6.-11. for each other region you would like to segment.
Click
Analyse regionsto analyse the spatial distribution of the regions you have drawn.If
Calculate volumesis selected, the volume of each brain area included in the segmented region will be calculated and saved.If
Summarise volumesis selected, then each region will be summarised (centers, volumes etc)If
Save segmentationis selected, then the segmented layer will be saved at the same time as the analysis is run (this may make your analysis take longer)
(Optional) Use the
Savebutton to save your segmented regions to be reloaded at a later date.
Note
All data will be saved into your brainreg output directory
Hint
For more information about how to use automated methods to segment your feature of interest, please see Analysing segmentation from other napari plugins. For full information on how to use brainglobe-segmentation, please see the brainglobe-segmentation page